You can place metal domes on your membrane switch, flex circuit, or circuit board in various ways. Metal domes can be placed in pockets or attached to adhesive tape. The most common way to secure metal domes to your substrate is with pressure-sensitive adhesive (PSA) tape. Metal domes backed with PSA tape are called PEEL-N-PLACE™arrays also, known as metal dome arrays. Pressure-sensitive adhesive tape is placed over the domes and attached to a carrier. Domes are then peeled off the carrier, also known as a release liner, and placed onto your circuit board.
Adhering domes to your circuit board using PEEL-N-PLACE arrays is more cost-effective, accurate, and faster than any hand placement techniques. Before securing metal dome arrays to your circuit board, there are many things you should take into consideration with your design.
Designing a Metal Dome Array
Before you place your domes on the circuit board, it is essential to understand the dome array’s construction. Metal dome arrays use a multi-layer tape construction that provides a sealed environment while still allowing domes to vent when compressed. There are typically two different layers—the top layer and the venting layer. If you choose to use just a single layer of tape, you must add vent holes to your board design. The top layer is the same as the single-layer tape construction.
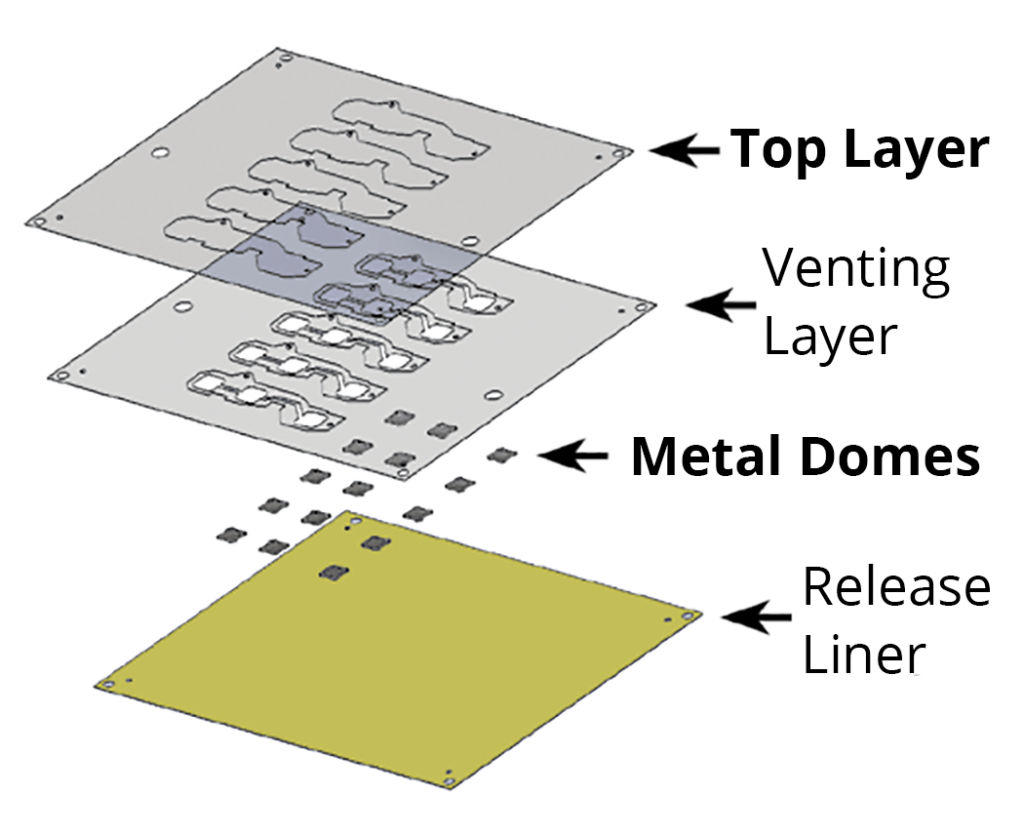
Venting is an essential part of the dome array and circuit design. Venting ensures the dome functions properly by allowing trapped air to escape. The venting layer has multiple material thickness options but should be equal to or less than half of the dome-free height. The vent tracks, also known as pathways, allow air displacement from one dome cavity to another. The widths of these tracks are typically 0.100″. To maintain an air seal, a minimum of 0.120″ material is required from the venting feature (i.e., dome cavity or vent track) to the perimeter cut of the array or any through-cut features such as alignment holes. The two layers are applied to each other using a mechanical laminator that has two pinch rollers. Once the two layers are laminated, domes are loaded into the cavities.
You must space domes adequately to ensure proper adhesion. Domes placed too closely together can result in poor adhesion and excessive “bubbles” in the adhesive material. Proper spacing depends on the dome size, shape, height, and proximity of the dome to other objects. There should be a minimum of 3mm between dome locations and from dome location to the end of the circuit board or flex circuit. Your design should always include dome locations, dome orientations, the outer perimeter desired (i.e., the edge of the circuit board), and any internal cut features.
How to Secure Dome Arrays
There are three main methods for mounting metal dome arrays to your circuit board:
- Manually placed by an assembler using visual alignment
- Manually placed by an assembler using an application fixture
- Automatically place using automation equipment
Depending on your setup, the most cost-effective method for mounting metal dome arrays is automatic placement equipment. In contrast, manual placement with an application fixture is faster, more accurate, and more cost-effective than visual alignment.

Whether you’re using an application fixture or automatic equipment, when securing a dome with pressure-sensitive adhesive tape, it is crucial to move air out of the venting area so that the domes don’t “float.” Floating happens when the air pocket around the dome causes the dome to stick to the top of the tape so that it is not resting securely on the circuit pad. To prevent this, place the domes with your pressure-sensitive adhesive tape directly onto the circuit board. Ensure the adhesive around the dome’s edges is secured to the circuit board and then moves outward to the adhesive edges. If the adhesive is too tight around the dome, it can cause the dome to collapse. This condition is also known as pre-load.
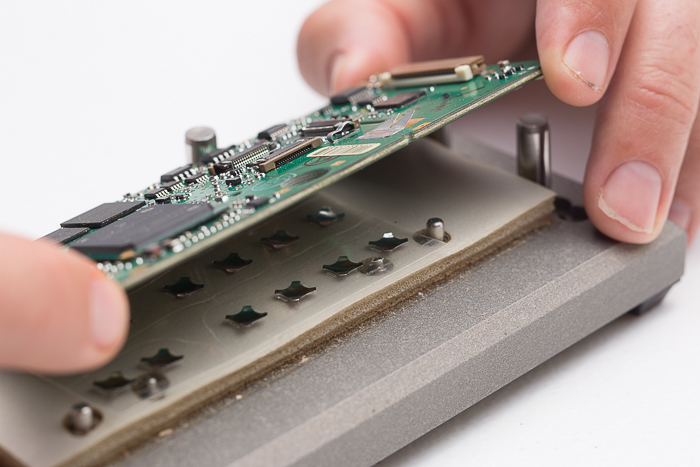
Custom application fixtures ensure fast and accurate placement of the dome array to the application surface. Stand-off springs and alignment pins allow your assembly team to press the circuit board onto the dome array in one easy step. With complex circuit board designs, the fixture may use existing holes in the circuit board. Application fixtures improve placement accuracy and help prevent any assembler errors.
The complexity of your design, project scale, and labor cost will impact whether you choose to mount manually, use an application fixture, or automatic placement equipment to place your dome array. Contact Snaptron today to get started on your metal dome array design.